Not many guides on the VU+ out there, and this is the best i have seen. If i get a VU+solo, (if it's ever released) this is where i am starting.
Dummies guide to setting up Vu+
These instructions are for Dream Elite Image, other images Green & Yellow buttons might be configured slightly different.
1. Install image.
Download a USB image file, eg Dream Elite from
http://www.digitalworldz.co.uk/downloads.php
Unzip the vuplus folder to the root directory of a USB Pen Drive.
Power off Vu+ with switch on the back
Insert USB Pen Drive into the USB socket on Vu+
Power on Vu+
Image will auto install from the USB Stick.
Look at the display on the receiver, it'll display when the update has finished.
Remove the USB Stick
Power off receiver.
Power on Receiver.
Image is now installed.
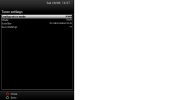
2. Network
Connect an Ethernet LAN cable from your router to your Vu+ Ethernet port.
Press Menu
Select Set Up
Select System
Select Network
Select Network w i z a r d and press OK.
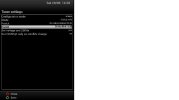
3. Setup Motorised Dish using USALS
First get your longitude & latitude info from multimap.com
Enter your post code into multimap.com and you'll get the correct LON & LAT info for your location.
Example if I enter the following UK postal code: SE1 6JZ
I get the following LON & LAT:
LON: 0.104 WEST
LAT: 51.497 NORTH
Press Menu
Select Setup
Select Service searching
Select Tuner configuration
Select Tuner A and press OK
Configuration Mode: Simple
Mode: Positioner
Longitude: input the info from multimap
Latitude: input the info from multimap
Press OK to save.
Press Menu
Select Setup
Select service searching
Select Positioner Setup
Select goto 0 Press RED Button
Dish should now go to 1w.
4. Download Channel List
Press Green Button
Press Yellow Button (Addons)
Select Addon Download Manager
Select Enigma2 Settings
Select Likra E2 Setting Motor and press OK.
5. Install cam
Press Green Button
Press Yellow Button (Addons)
Select Addons Download Manager Press OK
Select Image Cams Press OK
Select the cam you want to install and press OK
6. Activate cam
Press Blue button.
Use Left & Right Keys to select an installed cam and press OK.
This is enough to get you started, the fun starts learning the rest.
Dummies guide to setting up Vu+
Dummies guide to setting up Vu+
These instructions are for Dream Elite Image, other images Green & Yellow buttons might be configured slightly different.
1. Install image.
Download a USB image file, eg Dream Elite from
http://www.digitalworldz.co.uk/downloads.php
Unzip the vuplus folder to the root directory of a USB Pen Drive.
Power off Vu+ with switch on the back
Insert USB Pen Drive into the USB socket on Vu+
Power on Vu+
Image will auto install from the USB Stick.
Look at the display on the receiver, it'll display when the update has finished.
Remove the USB Stick
Power off receiver.
Power on Receiver.
Image is now installed.
2. Network
Connect an Ethernet LAN cable from your router to your Vu+ Ethernet port.
Press Menu
Select Set Up
Select System
Select Network
Select Network w i z a r d and press OK.
3. Setup Motorised Dish using USALS
First get your longitude & latitude info from multimap.com
Enter your post code into multimap.com and you'll get the correct LON & LAT info for your location.
Example if I enter the following UK postal code: SE1 6JZ
I get the following LON & LAT:
LON: 0.104 WEST
LAT: 51.497 NORTH
Press Menu
Select Setup
Select Service searching
Select Tuner configuration
Select Tuner A and press OK
Configuration Mode: Simple
Mode: Positioner
Longitude: input the info from multimap
Latitude: input the info from multimap
Press OK to save.
Press Menu
Select Setup
Select service searching
Select Positioner Setup
Select goto 0 Press RED Button
Dish should now go to 1w.
4. Download Channel List
Press Green Button
Press Yellow Button (Addons)
Select Addon Download Manager
Select Enigma2 Settings
Select Likra E2 Setting Motor and press OK.
5. Install cam
Press Green Button
Press Yellow Button (Addons)
Select Addons Download Manager Press OK
Select Image Cams Press OK
Select the cam you want to install and press OK
6. Activate cam
Press Blue button.
Use Left & Right Keys to select an installed cam and press OK.
This is enough to get you started, the fun starts learning the rest.
Dummies guide to setting up Vu+
Last edited by a moderator: