
Thanks to MRA for the idea of dumping 83850v2 and 93450 key, original post is here.
Inspired by his great idea, I have found a way to do the trick without soldering.
(source of the tutorial)
This is the overall diagram:
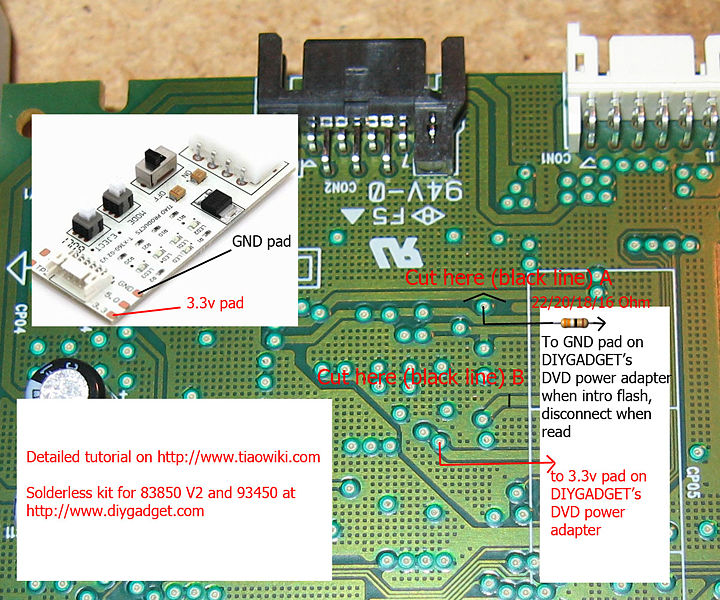
This is the kit we are using: CK3 and Solderless Key extractor for 83850 V2 and 93450
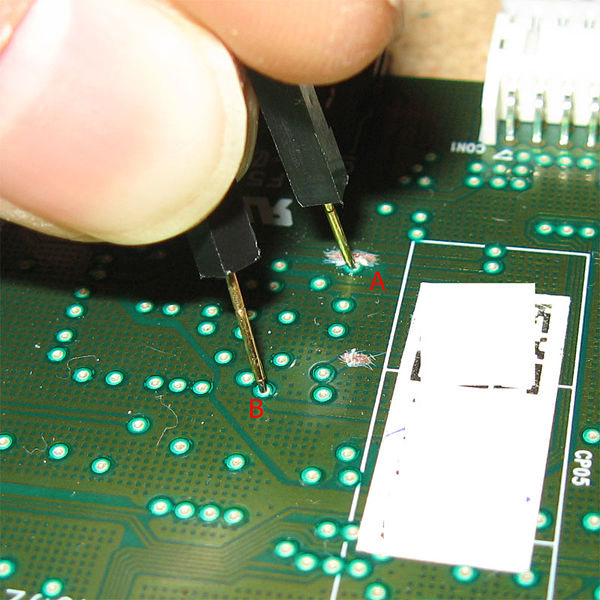
So, in order to dump the key, you will need to make 2 cuts on the PCB, (point A and B, make sure point A is a V cut, just to isolate the via from the trace, so best to cut from the middle of trace, as shown in the above picture). This part is relatively easy, but you better practice before you make the cut. Use a multimeter to check if the cuts are good. this is important.
The second part in the original instruction involves soldering the via, see below:

Basically, you need to connect the top via to GND via a 22 ohm or lower resistor, and connect the bottom via to a 3.3v line.
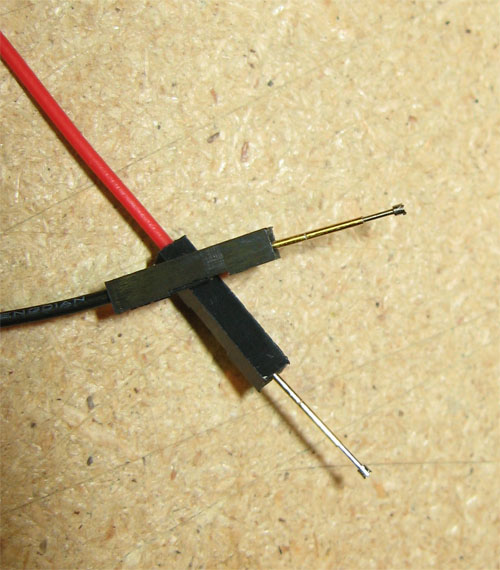
Instead of soldering the wires to the PCB (in order to access GND and 3.3v line), you could use 3 wires, one end of the first wire permanently connect to a 3.3V pad on DVD power adapter by using an alligator, and the other end connect to a pogo pin (let's call it pogo pin B ), so you can hold it on the bottom via to make the connection, this is similar to the 73x firmware key extracting.
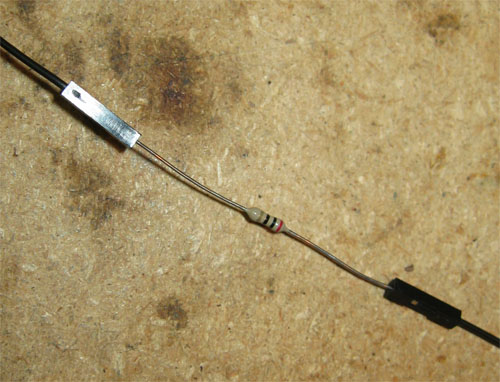
For the second wire, one end can permanently connect to the GND pad of DVD adapter, and the other end connect to a 22 ohm or lower resistor. Use 3rd wire to connect the other end of the resistor, and connect other end of the 3 wire to a pogo pin, let's call it pogo pin A.
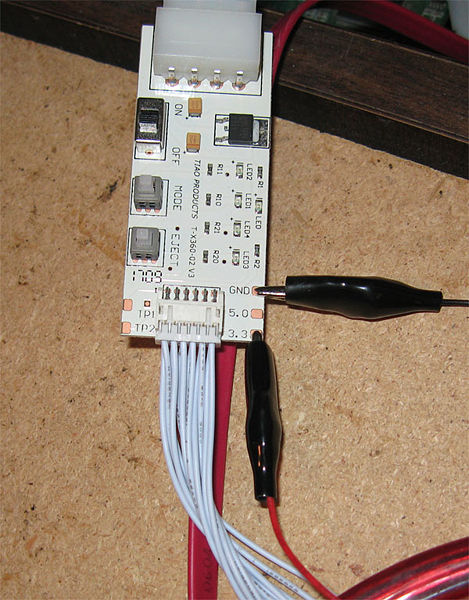
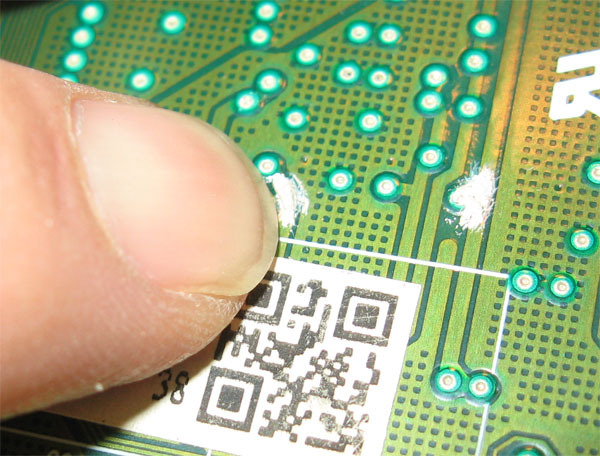
You do not need to connect all the flat cables originally connected to your PCB in order to extract the key. (see the pic below, the PCB is outside of the DVD housing, it is on my table).
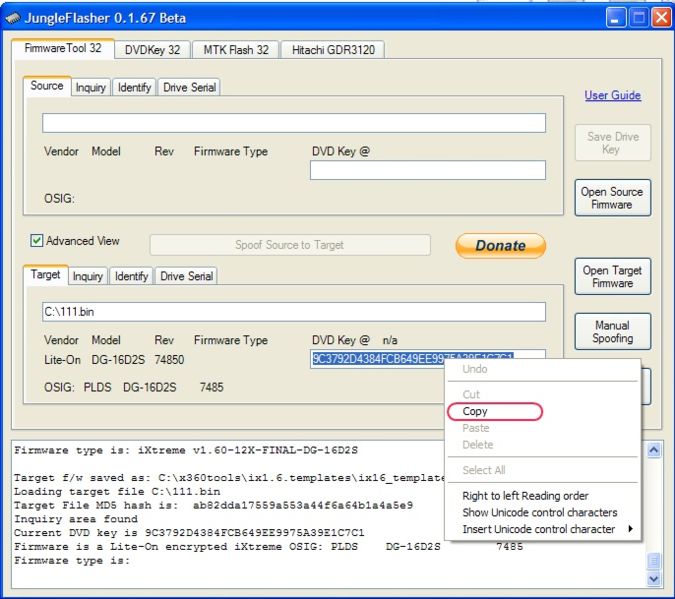
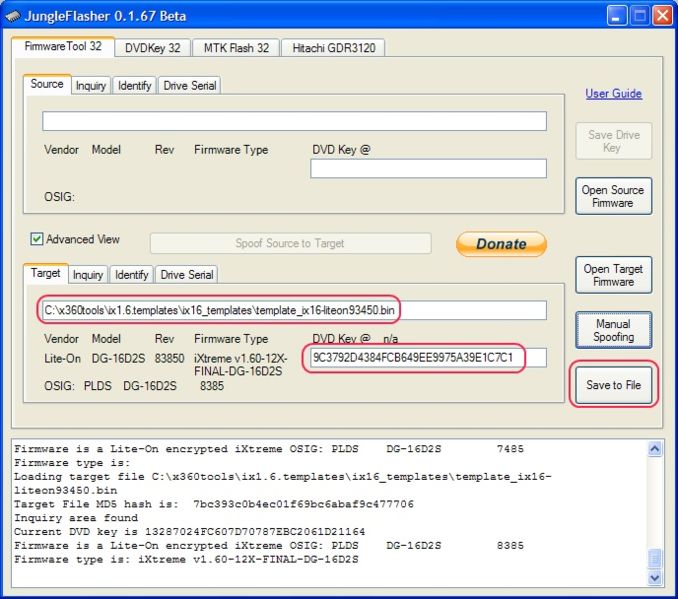
So, you use your left hand to hold the pogo pin B on the bottom via and pogo pin A on the top via, then turn on DVD power adapter, then launch DOSFLASH or JUNGLEFLASHER. If you see status 0x72, then, release pogo pin A from top via, then click 'Read firmware' to read the firmware and save it. Do it multiple times to make sure it is correct.

Now you have dumped the firmware.
Next step is to use Silver Conductive Glue to rejoin the cuts. Do not use carbon based conductive glue, because they are not stick enough and it won't stay. Give the glue a couple hours to dry. After you done this, use a multimeter to check the trace are rejoined. If everything is ok, replace the PCB back to the DVD housing.
to be continued...
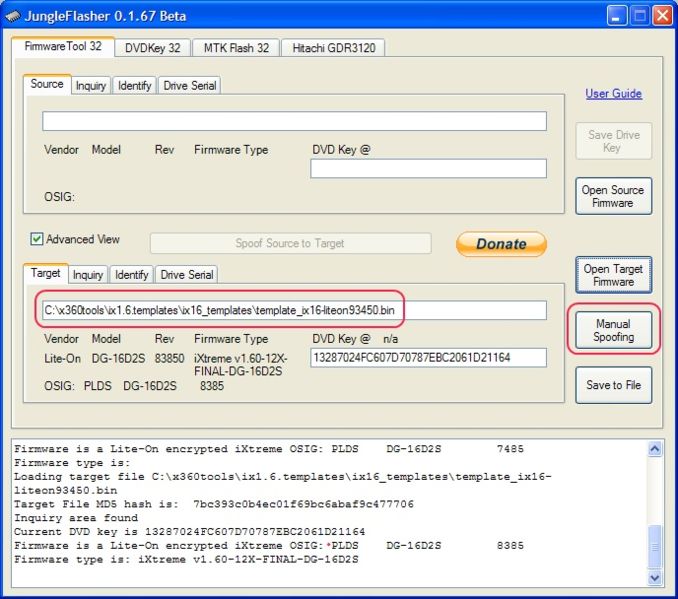
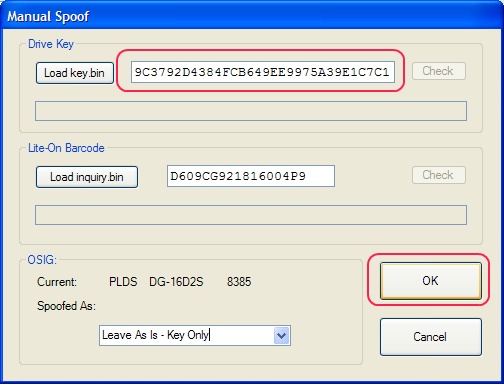
Then next step is to spoof the firmware and flash it back to your dvd.
Troubleshooting:
If you got status 0x80, 0x52 or 0x51, turn off your dvd power adapter for 5 seconds and turn on again, it may change to 0x72.
If the above does not work, try to replace the resistor to a lower value, e.g from 22to 20, or from 20 to 18, from 18 to 16 and try again. Do not go below 16.
If your PC freezes when you turn on your DVD power adapter, you can do it in DOS (use DOSFLASH 16bit version in DOS), or change your SATA driver to UNIATA driver as mentioned in the following tutorial and the do it again:
http://www.tiaowiki.com/w/Extracting_key%2..._PC_Freezing%29
[/quote]
Diygadget's Solderless 83850 V2 And 93450 Key Dump - Scenyx Entertainment Community
Inspired by his great idea, I have found a way to do the trick without soldering.
(source of the tutorial)
This is the overall diagram:
This is the kit we are using: CK3 and Solderless Key extractor for 83850 V2 and 93450
So, in order to dump the key, you will need to make 2 cuts on the PCB, (point A and B, make sure point A is a V cut, just to isolate the via from the trace, so best to cut from the middle of trace, as shown in the above picture). This part is relatively easy, but you better practice before you make the cut. Use a multimeter to check if the cuts are good. this is important.
The second part in the original instruction involves soldering the via, see below:
Basically, you need to connect the top via to GND via a 22 ohm or lower resistor, and connect the bottom via to a 3.3v line.
Instead of soldering the wires to the PCB (in order to access GND and 3.3v line), you could use 3 wires, one end of the first wire permanently connect to a 3.3V pad on DVD power adapter by using an alligator, and the other end connect to a pogo pin (let's call it pogo pin B ), so you can hold it on the bottom via to make the connection, this is similar to the 73x firmware key extracting.
For the second wire, one end can permanently connect to the GND pad of DVD adapter, and the other end connect to a 22 ohm or lower resistor. Use 3rd wire to connect the other end of the resistor, and connect other end of the 3 wire to a pogo pin, let's call it pogo pin A.
You do not need to connect all the flat cables originally connected to your PCB in order to extract the key. (see the pic below, the PCB is outside of the DVD housing, it is on my table).
So, you use your left hand to hold the pogo pin B on the bottom via and pogo pin A on the top via, then turn on DVD power adapter, then launch DOSFLASH or JUNGLEFLASHER. If you see status 0x72, then, release pogo pin A from top via, then click 'Read firmware' to read the firmware and save it. Do it multiple times to make sure it is correct.
Now you have dumped the firmware.
Next step is to use Silver Conductive Glue to rejoin the cuts. Do not use carbon based conductive glue, because they are not stick enough and it won't stay. Give the glue a couple hours to dry. After you done this, use a multimeter to check the trace are rejoined. If everything is ok, replace the PCB back to the DVD housing.
to be continued...
Then next step is to spoof the firmware and flash it back to your dvd.
Troubleshooting:
If you got status 0x80, 0x52 or 0x51, turn off your dvd power adapter for 5 seconds and turn on again, it may change to 0x72.
If the above does not work, try to replace the resistor to a lower value, e.g from 22to 20, or from 20 to 18, from 18 to 16 and try again. Do not go below 16.
If your PC freezes when you turn on your DVD power adapter, you can do it in DOS (use DOSFLASH 16bit version in DOS), or change your SATA driver to UNIATA driver as mentioned in the following tutorial and the do it again:
http://www.tiaowiki.com/w/Extracting_key%2..._PC_Freezing%29
[/quote]
Diygadget's Solderless 83850 V2 And 93450 Key Dump - Scenyx Entertainment Community
Last edited by a moderator:
