The XBMC Manual was created to provide collaborative documentation of XBMC Media Center and related topics. Feel free to contribute in any way that you can. If something's missing, add it.
I know there`s a lot of members who know about XBMC, this Tut is designed for our ever increasing new members, to help them along their way and maybe understand a bit more
1.First time user
Contents
1 XBMC main features
2 Installing XBMC
3 Adding files 3.1 Adding videos to the library
3.2 Adding music to the library
3.3 Adding pictures
4 Using a remote control
5 XBMC Addons
6 Changing the look and feel of XBMC
7 Important note about the Context Menu
8 Alternative guides
XBMC main features
XBMC can be used to play almost all popular audio and video formats.
Use your media as-is: XBMC can play CDs and DVDs directly from the disk or image file.
Powerful library that can automatically scan media to retrieve covers, descriptions and fanart from the internet.
Playlist and slideshow functions
Flexible, simple to use add-ons that can extend the functions of XBMC
Network playback built in - stream any playable media from anywhere in the house or internet.
2 Installing XBMC
If you haven't already done so, download XBMC from HERE/ or see the installation guides here: Installing
3 Adding files
While you can just use XBMC with plain file views, adding/scanning files to the library will add rich features such as cover art, summaries, thumbnails, trailers, and more.
To just quickly add files see Adding videos to the library/Adding media sources.
3.1 Adding videos to the library
Main pages: Adding videos to the library and Video library
XBMC can search the Internet and automatically find information about your movies and TV shows using scrapers. To be most effective your movie and TV show files should be named according to standard naming conventions.
The filename is referenced by a search within the online records and the closest match is selected. If the filename is not exactly or very close to the movie title the automatic scan may not always offer accurate matches.
3.2 Adding music to the library
See main page: Adding music to the library and Music library
In order to be able to include information on your music collection in the library, XBMC needs your music to be tagged. When your collection is scanned, XBMC stores all the tagging information (artist, album, year, genre, etc) in the database which allows you to efficiently search and manage your music collection. Today most media applications and players (e.g. iTunes / iPod) organize music by this ID tag information.
Note: Your audio files must have a valid ID tag for them to work properly in the XBMC music library.
3.3 Adding pictures
Adding sources for your pictures follows the same method as adding other media sources. From the Home Page navigate to Pictures, select Add Source and browse to the location of your picture files.
4 Using a remote control
Often the most convenient and user friendly way of controlling XBMC is using a remote control. This further enhances the appliance feel of the XBMC and fits next to (or replaces) the other remotes that are likely to be in your entertainment room. MCE Remote controls are usually the cheapest and easiest to use with XBMC, but many other remote controls have been very successfully used with XBMC. Additionally, on Windows and to a more limited extent on Linux, you can use your Xbox 360 controller as a remote, which can be particularly useful in gaming and [w:Video_game_console_emulator|emulator]] setups.
For more information on remote controls and XBMC please explore the links below:
Remote Control Reviews
Remote Controls
Using an MCE remote control in Windows
Using a remote control with XBMC
Keyboard controls
Xbox 360 Wireless Controller for Windows
5 XBMC Addons
XBMC has the ability to dramatically extend its functionality through the use of add-ons, which provide access to internet media, information, screensavers, services, and more. For a more in-depth explanation, visit the wiki section on XBMC add-ons.
6 Changing the look and feel of XBMC
XBMC is unlike many contemporary media and gaming centers, in that it can be easily customized to look completely different using skins while still remaining equally as useable and providing access to all your videos, music, and more.
To get new skins, go to: System -> Appearance -> Skin -> Skin Confluence
You will be provided a list of currently installed skins and an option to "Get More..." where you can download additional skins.
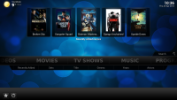

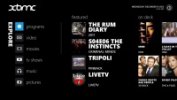
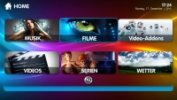


Confluence - the default skin Aeon Nox Immersive Titan Welo Transparency
XBMC can be installed on a wide range of supported hardware, from normal desktop computers, ARM powered tablets and phones, to tiny set-top-boxes, and more.
 :
:
Android
XBMC for Android is a full port of the complete XBMC application to Google's Android operating-system. With the Android NDK (Native Development Kit for Android) XBMC runs natively under Android as a Native Activity application. The initial aim for the Android port is to get XBMC working on inexpensive Android set-top-boxes. Phones and tablets will be supported as well for those who want XBMC on-the-go.

iOS (iDevice) and Apple TV 2 (black)
XBMC for iOS is a full port of XBMC to Apple's iOS operating-system. iOS supports both 720p and 1080p hardware accelerated video decoding of H.264 videos, and is compatible several Apple's iDevice's and Apple TVs that uses Apple A4 or higher SoC processors with a jailbroken iOS operating-system. iOS has full touchscreen support as well as video-out cable support for iDevices.

Linux
These instructions covers several Linux distributions.
XBMC for Linux is primarily developed for Ubuntu Linux. Third-party packages for most other Linux distributions are however available, and it is also possible to compile XBMC Media Center from scratch for nearly any Linux distribution. Linux supports full hardware decoding with most graphics cards. Linux is generall the best way to get a fast, free, and "applicance" feel for an XBMC HTPC

Mac OS X
XBMC for Mac runs natively on Mac OS X. Mac OS X can provide hardware video decoding for H.264 and MPEG2 video, though most CPUs are able to software decode other formats in 1080 as well. Macs can use the Apple TV remote, among others, for control of XBMC. An Intel Mac running OS X 10.6 or higher is required for XBMC.
I know there`s a lot of members who know about XBMC, this Tut is designed for our ever increasing new members, to help them along their way and maybe understand a bit more
1.First time user
Contents
1 XBMC main features
2 Installing XBMC
3 Adding files 3.1 Adding videos to the library
3.2 Adding music to the library
3.3 Adding pictures
4 Using a remote control
5 XBMC Addons
6 Changing the look and feel of XBMC
7 Important note about the Context Menu
8 Alternative guides
XBMC main features
XBMC can be used to play almost all popular audio and video formats.
Use your media as-is: XBMC can play CDs and DVDs directly from the disk or image file.
Powerful library that can automatically scan media to retrieve covers, descriptions and fanart from the internet.
Playlist and slideshow functions
Flexible, simple to use add-ons that can extend the functions of XBMC
Network playback built in - stream any playable media from anywhere in the house or internet.
2 Installing XBMC
If you haven't already done so, download XBMC from HERE/ or see the installation guides here: Installing
3 Adding files
While you can just use XBMC with plain file views, adding/scanning files to the library will add rich features such as cover art, summaries, thumbnails, trailers, and more.
To just quickly add files see Adding videos to the library/Adding media sources.
3.1 Adding videos to the library
Main pages: Adding videos to the library and Video library
XBMC can search the Internet and automatically find information about your movies and TV shows using scrapers. To be most effective your movie and TV show files should be named according to standard naming conventions.
The filename is referenced by a search within the online records and the closest match is selected. If the filename is not exactly or very close to the movie title the automatic scan may not always offer accurate matches.
3.2 Adding music to the library
See main page: Adding music to the library and Music library
In order to be able to include information on your music collection in the library, XBMC needs your music to be tagged. When your collection is scanned, XBMC stores all the tagging information (artist, album, year, genre, etc) in the database which allows you to efficiently search and manage your music collection. Today most media applications and players (e.g. iTunes / iPod) organize music by this ID tag information.
Note: Your audio files must have a valid ID tag for them to work properly in the XBMC music library.
3.3 Adding pictures
Adding sources for your pictures follows the same method as adding other media sources. From the Home Page navigate to Pictures, select Add Source and browse to the location of your picture files.
4 Using a remote control
Often the most convenient and user friendly way of controlling XBMC is using a remote control. This further enhances the appliance feel of the XBMC and fits next to (or replaces) the other remotes that are likely to be in your entertainment room. MCE Remote controls are usually the cheapest and easiest to use with XBMC, but many other remote controls have been very successfully used with XBMC. Additionally, on Windows and to a more limited extent on Linux, you can use your Xbox 360 controller as a remote, which can be particularly useful in gaming and [w:Video_game_console_emulator|emulator]] setups.
For more information on remote controls and XBMC please explore the links below:
Remote Control Reviews
Remote Controls
Using an MCE remote control in Windows
Using a remote control with XBMC
Keyboard controls
Xbox 360 Wireless Controller for Windows
5 XBMC Addons
XBMC has the ability to dramatically extend its functionality through the use of add-ons, which provide access to internet media, information, screensavers, services, and more. For a more in-depth explanation, visit the wiki section on XBMC add-ons.
6 Changing the look and feel of XBMC
XBMC is unlike many contemporary media and gaming centers, in that it can be easily customized to look completely different using skins while still remaining equally as useable and providing access to all your videos, music, and more.
To get new skins, go to: System -> Appearance -> Skin -> Skin Confluence
You will be provided a list of currently installed skins and an option to "Get More..." where you can download additional skins.


Confluence - the default skin Aeon Nox Immersive Titan Welo Transparency
XBMC can be installed on a wide range of supported hardware, from normal desktop computers, ARM powered tablets and phones, to tiny set-top-boxes, and more.
 :
: Android
XBMC for Android is a full port of the complete XBMC application to Google's Android operating-system. With the Android NDK (Native Development Kit for Android) XBMC runs natively under Android as a Native Activity application. The initial aim for the Android port is to get XBMC working on inexpensive Android set-top-boxes. Phones and tablets will be supported as well for those who want XBMC on-the-go.
iOS (iDevice) and Apple TV 2 (black)
XBMC for iOS is a full port of XBMC to Apple's iOS operating-system. iOS supports both 720p and 1080p hardware accelerated video decoding of H.264 videos, and is compatible several Apple's iDevice's and Apple TVs that uses Apple A4 or higher SoC processors with a jailbroken iOS operating-system. iOS has full touchscreen support as well as video-out cable support for iDevices.

Linux
These instructions covers several Linux distributions.
XBMC for Linux is primarily developed for Ubuntu Linux. Third-party packages for most other Linux distributions are however available, and it is also possible to compile XBMC Media Center from scratch for nearly any Linux distribution. Linux supports full hardware decoding with most graphics cards. Linux is generall the best way to get a fast, free, and "applicance" feel for an XBMC HTPC

Mac OS X
XBMC for Mac runs natively on Mac OS X. Mac OS X can provide hardware video decoding for H.264 and MPEG2 video, though most CPUs are able to software decode other formats in 1080 as well. Macs can use the Apple TV remote, among others, for control of XBMC. An Intel Mac running OS X 10.6 or higher is required for XBMC.
Last edited:


